Tuesday

Bibliography

Bibliography for Makeup in Motion

BOOKS
KEYES, J, 1968, A History of Women's Hairstyles 1500-1965, Great Britain, Methuen
CORSON, R, NORCROSS, B.G, GLAVAN, J, 2009, Stage Make Up, Tenth Edition, Focal Press

WEBSITES
IMDB, 2011, Great Expectations, (25/01/2015) available http://www.imdb.com/title/tt1949720/
SPARK NOTES, Spark notes for Frankenstein, (26/01/2015) available http://www.sparknotes.com/lit/frankenstein/themes.html
IMDB, 2009, The Young Victoria, (24/03/2015) http://www.imdb.com/title/tt0962736/
QUEEN VICTORIA, 2009, The Young Victoria The Movie, (24/03/2015) http://www.queenvictoria.victoriana.com/youngvictoria.html
BBC ACADEMY, Tips: Make up for HD (01/05/2015) http://www.bbc.co.uk/academy/production/article/art20130702112136285
SPARK NOTES, Spark notes for Great Expectations, (03/01/2015) http://www.sparknotes.com/lit/greatex/themes.html
BRISTISH LIBARARY, Discovering Literature: Romantics and Victorians, Great Expectations, (10/02/2015) http://www.bl.uk/romantics-and-victorians/articles/the-gothic-in-great-expectations
BEAUTIFUL WITH BRAINS, Beauty in the Victorian age, (03/01/2015) http://beautifulwithbrains.com/2010/08/06/beauty-in-the-victorian-age/
IMDB, 2012, Great Expectations 2012, (20/01/2015) http://www.imdb.com/title/tt1836808/
IMAGES

Creating Quentin

Product List:

  • Ultra foundation
  • Illamasqua Skin Base
  • Ben Nye Powder
  • Kryolan concealer
  • Tissue
  • Duo eyelash adhesive
  • Aqua Colours
  • Supra Colours
  • Illamasqua contour palette
  • Vivo eyebrow palette 
  • Hair wax
  • comb
  • hairspray
I began by setting up work station and started preparing the skin for the foundation base, I mixed it slightly lighter to create a dead vampire look. I applied this, blending with a wet sponge as I went. I powdered this and then began to create the veins. I applied duo glue (less harsh to remove then liquid latex) under the eyes in different shaped lines and applied small rolled up bits of tissue to the glue. I did this to both sides then coloured it in foundation to match the skin. I then took brown eye shadow to the top lip and blended this over. I then started to colour the veins with blues, reds and greys from my aqua colour palette. I added red liner to the lash line and water line and blended this out, and then red supra colour and blended this out under the eyes also. I then moved onto making the facial hair darker, I took brown eye shadow and ran it through the eyebrows and then blended it with a big fluffy brush into the facial hair that was already on my models face. I then dripped a bit of fake blood on one side of the mouth to make it look like the vampire had been feeding. Next it was time for hair and it was very simple I just took a small piece of wax, warmed it up between my fingers and started spiking the hair up. I finished with hairspray. 


I then shot on a staircase for a location, I liked this because the series is about modern vampires and the lighting looked eerie and creepy.

Here are some action shots...


EVALUATION: 

Overall I am very pleased with how my Quentin look turned out. I think the veins look quite realistic and like the ones on the vampires on The Vampire Diaries. I dressed him in black just like the character Damon Salvatore in the show and to show up on the white background. I really enjoyed creating these characters and I would love to see what this make up would look like in an outside surrounding location. 

Creating Claudia

Product List:

  • Ultra foundation
  • Illamasqua Skin Base in White
  • Ben Nye Powder
  • Kryolan concealer
  • Urban Decay naked 1 palette
  • Illamasqua quad palette
  • Kryolan colour viva palette
  • Mac Dolly pop blush
  • Illamasqua contour palette
  • Mac lip mixes in Red and Black
  • Red lip liner
  • Dior Mascara 
  • Mac pressed pigment 
  • Curling tongs
  • sections clips
  • comb
  • hairspray


I began by setting up my work station ready and prepared to create Claudia. I stuck my face chart to the mirror and heated up the curling tong and then began to curl the hair. I set this as I went with hairspray and then let it cool. I then moved onto the make up, starting with the base, I mixed the right colour and made sure I paid full attention to the base as I wanted this to be flawless. I then concealed any redness and blemishes and then set the look with powder. I then contoured the face and applied blush, rather heavy to make sure the studio lights didn't bleach the skin out. I then moved onto the eye-shadow creating a deep and sparkly smokey gold eye. I applied lashing s of mascara to get the lashes as full as possible. I then moved onto the lip and lined and filled the entire lip with red lip liner. I then took black and red lip mix and mixed them to create a dark red and then applied this over the the lips, I then just took the black and created an ombre lip but adding it to the corners and blending it in to the red. 


Claudia completed look with wardrobe, hair and make up.

Next was to move on to the sfx on the arm, I made this with tissue and latex. I feel like this went really and was the best I had ever done it. The colouring was working better than it had any other time I had done it. 


Once I completed all of the jobs at hand it was now time to shoot the look at a professional levels. Here is the outcome...


EVALUATION

This was a my favourite part of this semester. Overall I am so happy with the outcome of my Claudia character, I feel like I interpreted this brief well and researched The Vampire Diaries to create two characters that could fit in well. I love how the make up turned out, it photographed beautifully and I believe that it is one of my best pieces of work in terms of skill and creativeness. The only downside I have to this is I wanted the hair to look a little bit more natural but I am still happy with how it turned out.

If I was to do this project again I would probably step outside of my comfort zone and perhaps go with a series I don't know so much about. I would like to make a monster. Do more research of a series I am not familiar with and create more elaborate creatures. 


Quentin Hair Chart and Hair Ideas


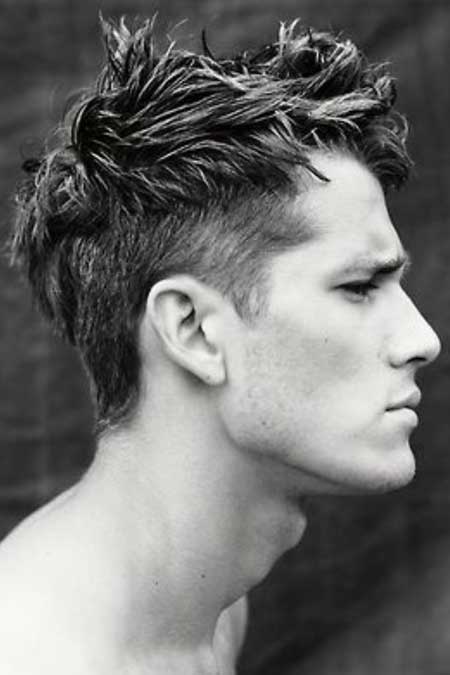
These are some images of how I would Quentin's hair to look like. It is very similar to how the Vampire Diaries actors have theirs. I will style it with wax and hairspray and I will run my fingers through it spiking sections up messily.

Quentin's Hair Chart. 


Claudia Hair Chart and Hair Ideas


These are some of the images that gave me inspiration to create big voluminous waves for my Claudia Character. I would start buy setting the hair after curling it and then once these had set and cooled brush them out and make them look like natural messy waves. 

This is the hair chart I drew for Claudia. 


My Mood Board for The Vampire Diaries


This is my mood board for The Vampire Diaries. I have featured pictures of the make up and styling from the show. I used the colour red on this mood board as this is a colour that is part of the colour scheme for the show. It features characters such as Elena, Damon and Stefan as well as a group cast promo shot.

Practising Quentin's Make up

I first decided I was going to draw the veins on under Quentin with red and white eye liners. This did look realistic by more like scratches and not veins. Here is some of the pictures I took. 


I did really like this look and I knew it would take much to do this, it would be quick to achieve. But I didn't feel like it was realistic enough and I wanted to push my make up skills a bit more. So I then thought about using the same technique as I did for Claudia for her tree scar.  


This is the practice of the make up for Quentin, I'm really happy, with how the veins have turned out.To me they look like they are really coming out of the skin. I used blues, greys. reds and browns to colour and make them look like what the actors have applied in the series. 

Practising Claudia's Make Up


This is the lip I want to create for Claudia. I used mac lip mix's to create this burgundy lip, I used the red and black and mixed and blended with a red lip liner from barry m. 


The scar/tree/vein marking on Claudia's arm was the most trickiest thing for me to come up with. I was looking for the best special effects materials to use for ages, after trying different techniques like waxes and gelatine, I ended up trying tissue and latex on a whim and the outcome after colouring was very good. 


I drew out vein shaped in the latex and rolled up 1 ply pieces of tissue really thinly and moulded them onto the latex create a vein shape.

Quentin Face Chart

I knew straight away what I wanted to do for Quentin. I knew there was really only one way to show he was a vampire in The Vampire Diaries and that was to create veins under the eyes. These are what makes the Vampires in this series stand out from other on screen vampires. The face/base make up will be very flawless and basic. Slightly contoured for a chiselled look to the face, making the male bone structure show. I will use cream make ups and powders. The lips will be left natural so he still looks manly. The eyebrows brushed and darkened slightly. I will create the veins either two ways , under the eyes with tissue and latex to create a 3D effect and then coloured with really light aqua colours. The other way is to draw them on with aqua colours and pencils. I will need to practice these two techniques and see what ones look more effective. I will smudge red eye-liner on the water line and under the eye to make them red just like in the vampire diaries. 

Claudia Face Charts

Design 1:

This is my favourite of the looks I have designed for Claudia. I went with a contoured complexion, and quite heavy with blush. The eyes are a gold. black and brown smokey cat eye with a highlighted inner corner, I will do this with a pressed pigment. The eyebrows will be quite full but still very natural. My favourite part of this look is the lips. These are red with a darker colour in the corners creating a vampy looking ombre lip. I will use a range of products from my kit such as Kryolan, Urban Decay, Mac, Ben Nye and Illamasqua. The lashes will be full and I will more than likely put a set of false lashes on my model. 


Design 2:

This is a duller, every day version of my first design. I have made it more day appropriate but taking away the shimmer and using matte shadows in similar colours instead. Instead of contour it was more of a bronze just to give the face a bit of colour. The lips would be a light red stain not a lipstick. The brows would be less full but still shaped. There would be no fake eyelashes. This isn't my  favourite but I can still see this make up fitting in well with The Vampire Diaries. 


Design 3: 

This is a bit different to the first two I went with a modern pin up look. I would create a winged liner and a bright pink lip. The skin would be contoured heavily, with a nice pop of pink on the cheeks. I would fill the brows in quite a lot, shaping them with powder. I don't think I would use this one because I cant see it fitting in the series 100%. I would create a flawless base with cream foundations. 

Monday

Practical Session: Contemporary Hairstyles inspired by American Horror Story

Product List:
  • Comb
  • Curling tong
  • Brush
  • Pins
  • Grips
  • Sectioning clips
For this lesson Lottie showed us how to create contemporary hairstyles inspired by characters from the series American Horror Story.

STYLE 1:

We began by curling the whole of the hair. Starting with brick work down the back and then curling the front of the head in neat sections.


The first style we created was a sweeping curled fringe with the bottom of the hair rolled up and tucked in.


First begin by sweeping the front sections of hair to the back following the natural flow of the curls and pin into place.


I then rolled the bottom section of the hair up and into itself to create a kind of faux bob.

I was very happy how this style turned out.

STYLE 2:


The next style was sleek curls, this was very easy to do. Just get your client to tip there head forward to create a smooth look and finish with hairspray.

STYLE 3:


This was very similar to style 2 but instead I added volume to the roots by back combing. It was very simple to create but very effective. I finished with hairspray.


Practical Session: Fashion Make up


Using these looks created by Pat McGrath for John Gallianno we were to come up with our own look inspired from theses looks. This was mine...


I was very happy with how this turned out. It was so much fun and it was nice to have change from Great Expectations and designing Claudia and Quentin. I loved this kind of lesson because this is the type of make up I want to aspire to do later in my career. 

Me and Jamie enjoyed it so much we stayed to do more after lesson and practised hair as well. Unfortunately we were aiming to get professional photos but there was issues with the lighting. Hopefully I can recreate this one day and place it in my portfolio.